
Look, I get it. You wake up with exactly 30 minutes to transform from zombie to human, and somewhere in that chaos, you’re supposed to contour your face like a Kardashian? Yeah, no thanks. Most of us have watched those YouTube tutorials where someone spends 45 minutes blending their face into oblivion, and honestly, who has that kind of time?
Here’s the thing though—contouring doesn’t have to be a marathon. It’s basically makeup’s way of playing with shadows and light to fake better bone structure (because genetics didn’t do us all the same favors, apparently). And when done right, it’s genuinely transformative. I’m talking instant cheekbones, a slimmer nose, and a jawline that could cut glass.
I’m going to show you how to contour your face in five minutes flat. Not kidding. These are the same tricks pro makeup artists use when they need to work fast—think backstage at fashion shows or on film sets where time equals money. You’ll learn which products actually matter, which steps you can skip without guilt, and the sneaky techniques that make you look like you spent way longer than you actually did.
Why 5-Minute Contouring Works
Can we talk about the biggest lie in beauty? That contouring requires 17 products and the patience of a saint. It doesn’t.
The truth is, most of those elaborate contouring routines you see online are designed for photography or stage lighting. For real life? You need about 20% of that effort to get 80% of the results. Quick contouring works because it focuses on what actually matters—the areas that create the most dramatic difference with the least amount of product.
A simplified routine has some serious perks:
- You’ll actually do it (consistency beats perfection every time)
- Less product means more natural results
- Fewer steps equal fewer chances to mess up
- Your skin gets a break from heavy makeup
Quick contouring is perfect for daily makeup, busy mornings when you overslept (again), casual outings, or any time you want to look polished without the production. Save the elaborate stuff for special occasions when you have time to play.
What You’ll Need
Let’s keep this simple. You don’t need a whole contour kit that costs more than your phone bill.
Essential products:
- Contour product (stick or powder, we’ll discuss which in a sec)
- Blending tool (beauty sponge or brush)
- That’s literally it for bare minimum
Optional but nice to have:
- Highlighter (seriously elevates the whole look)
- Setting spray or powder
- Mirror with good lighting (obvs)
Quick product recommendations by skin type:
- Oily skin: Go powder all the way—cream products will slide right off
- Dry skin: Cream or stick formulas blend like butter
- Combination: You lucky duck, you can use either
Tools that speed things up:
- A damp beauty sponge (blends in seconds)
- A fluffy brush for powder
- Your fingers (honestly underrated for cream products)
The 10 Pro Secrets To Contouring Your Face
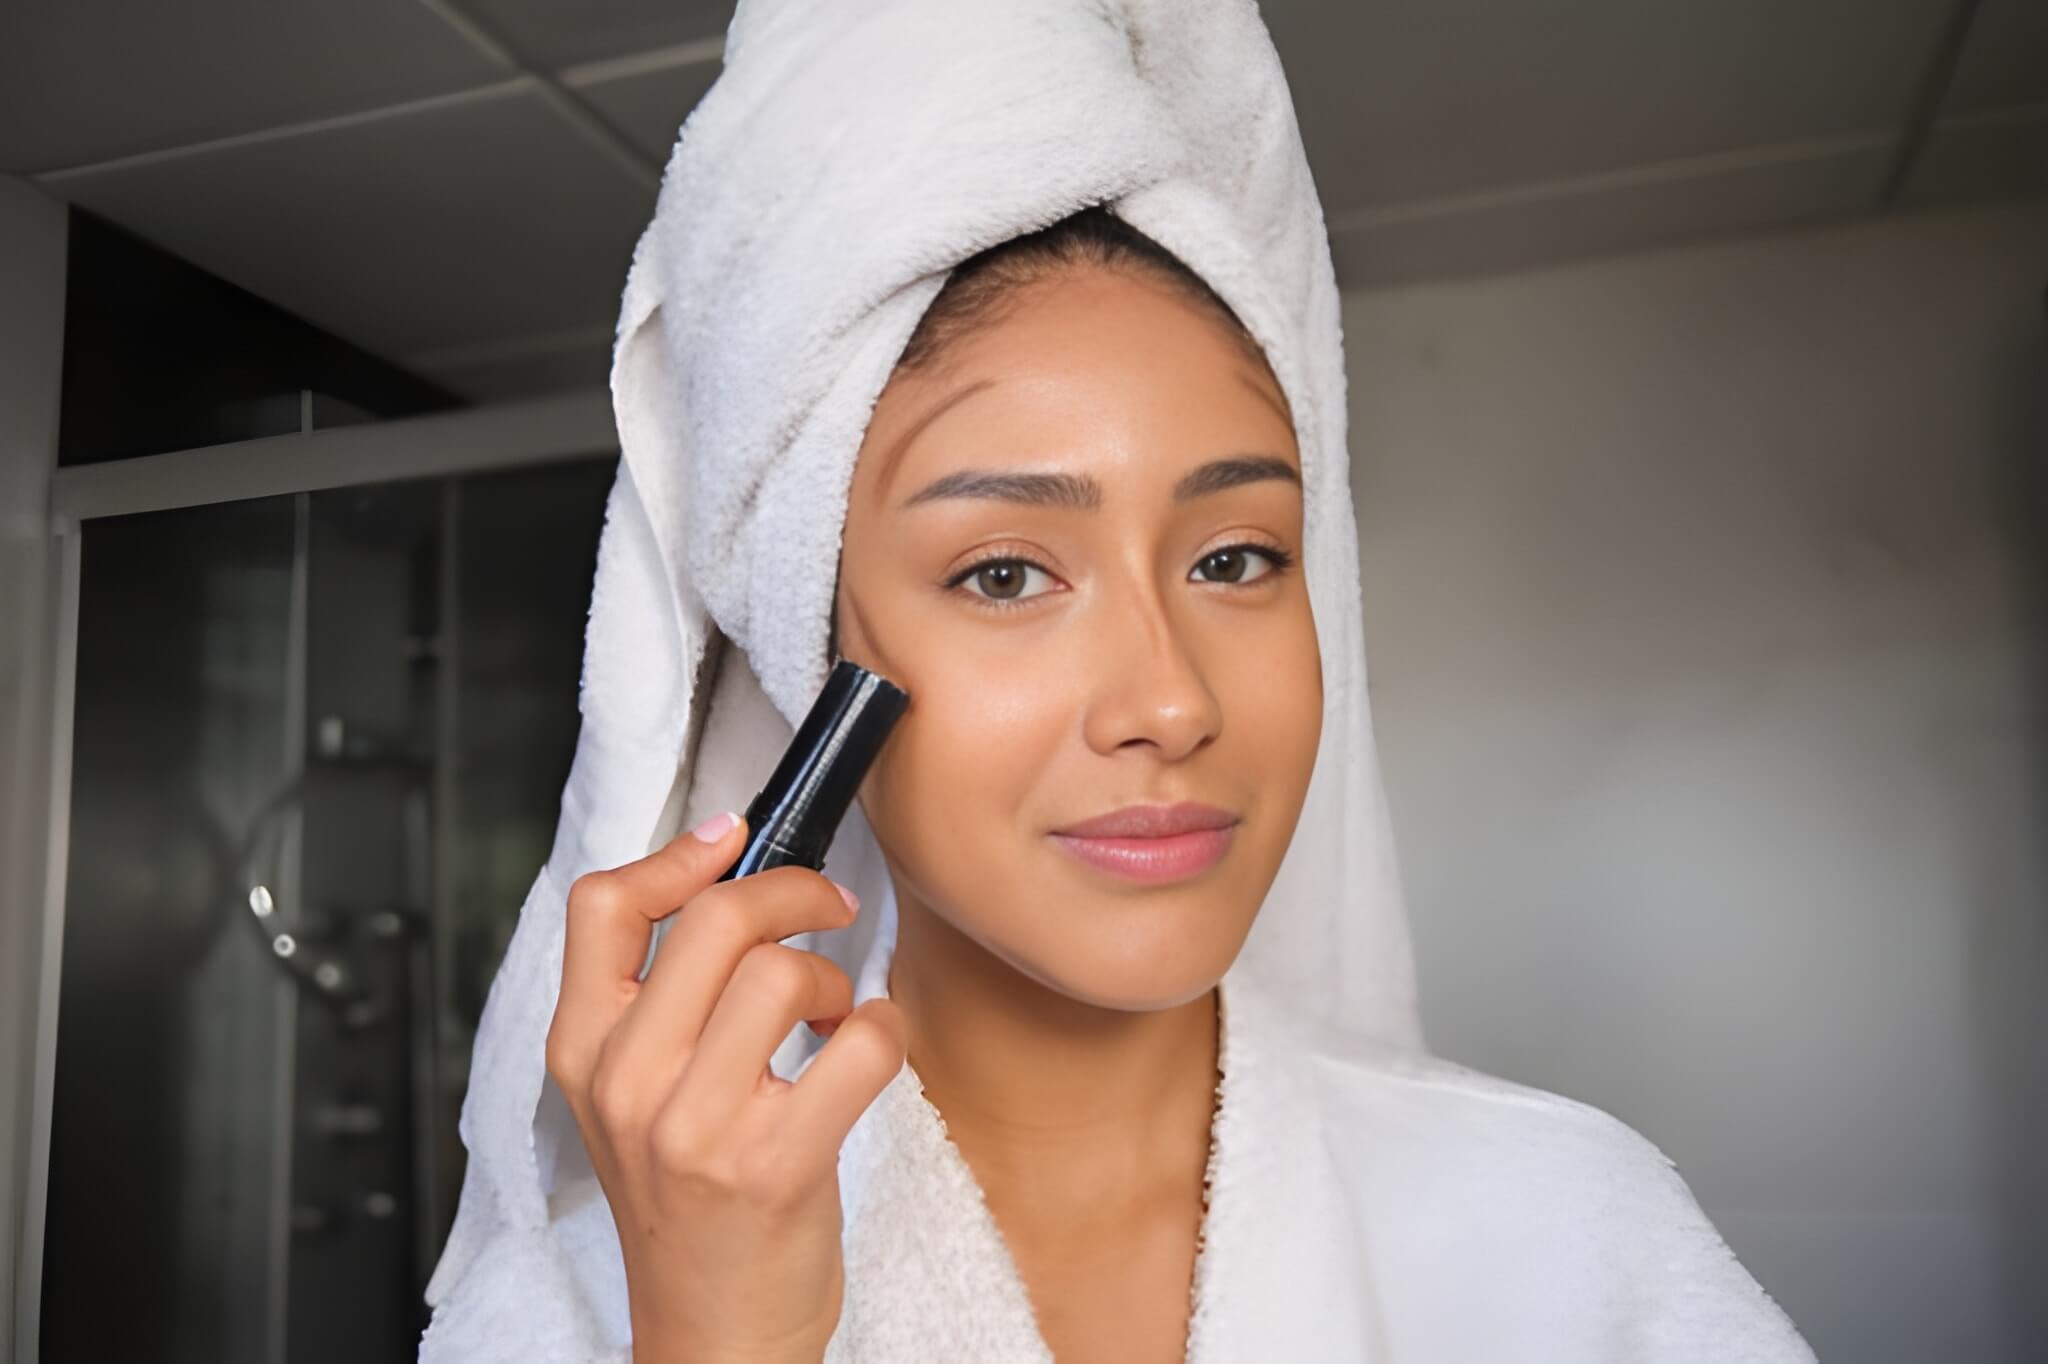
Secret #1: Start with the Right Formula

This is where most people waste time. Cream products are faster for most people, period. They blend easier, require less precision, and you can use your fingers if you’re in a rush.
Powder is great if you’re oily or prefer a super matte finish, but it requires more blending finesse. IMO, cream sticks are the MVP for speed—you swipe, blend, done.
Advertisement
Color selection tips:
- Hold the product against your jawline, not your arm
- It should look like a natural shadow, not brown or orange
- Cool-toned shades work better than warm for most people
- When in doubt, go lighter—you can always add more
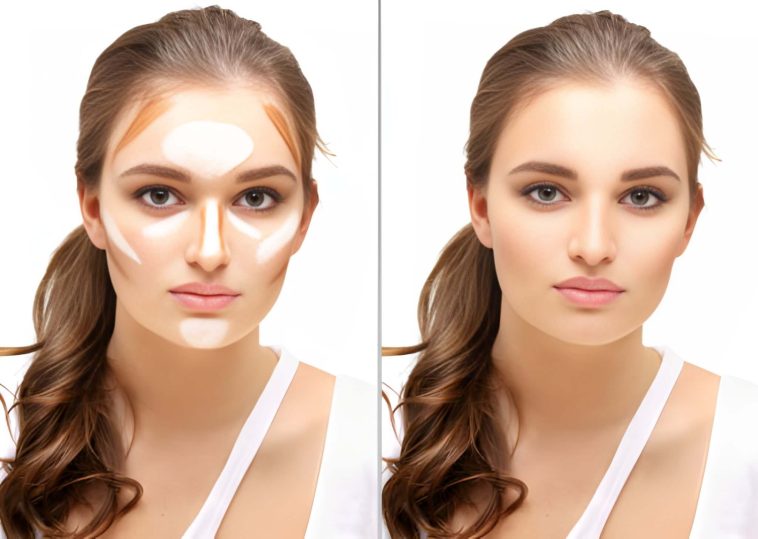
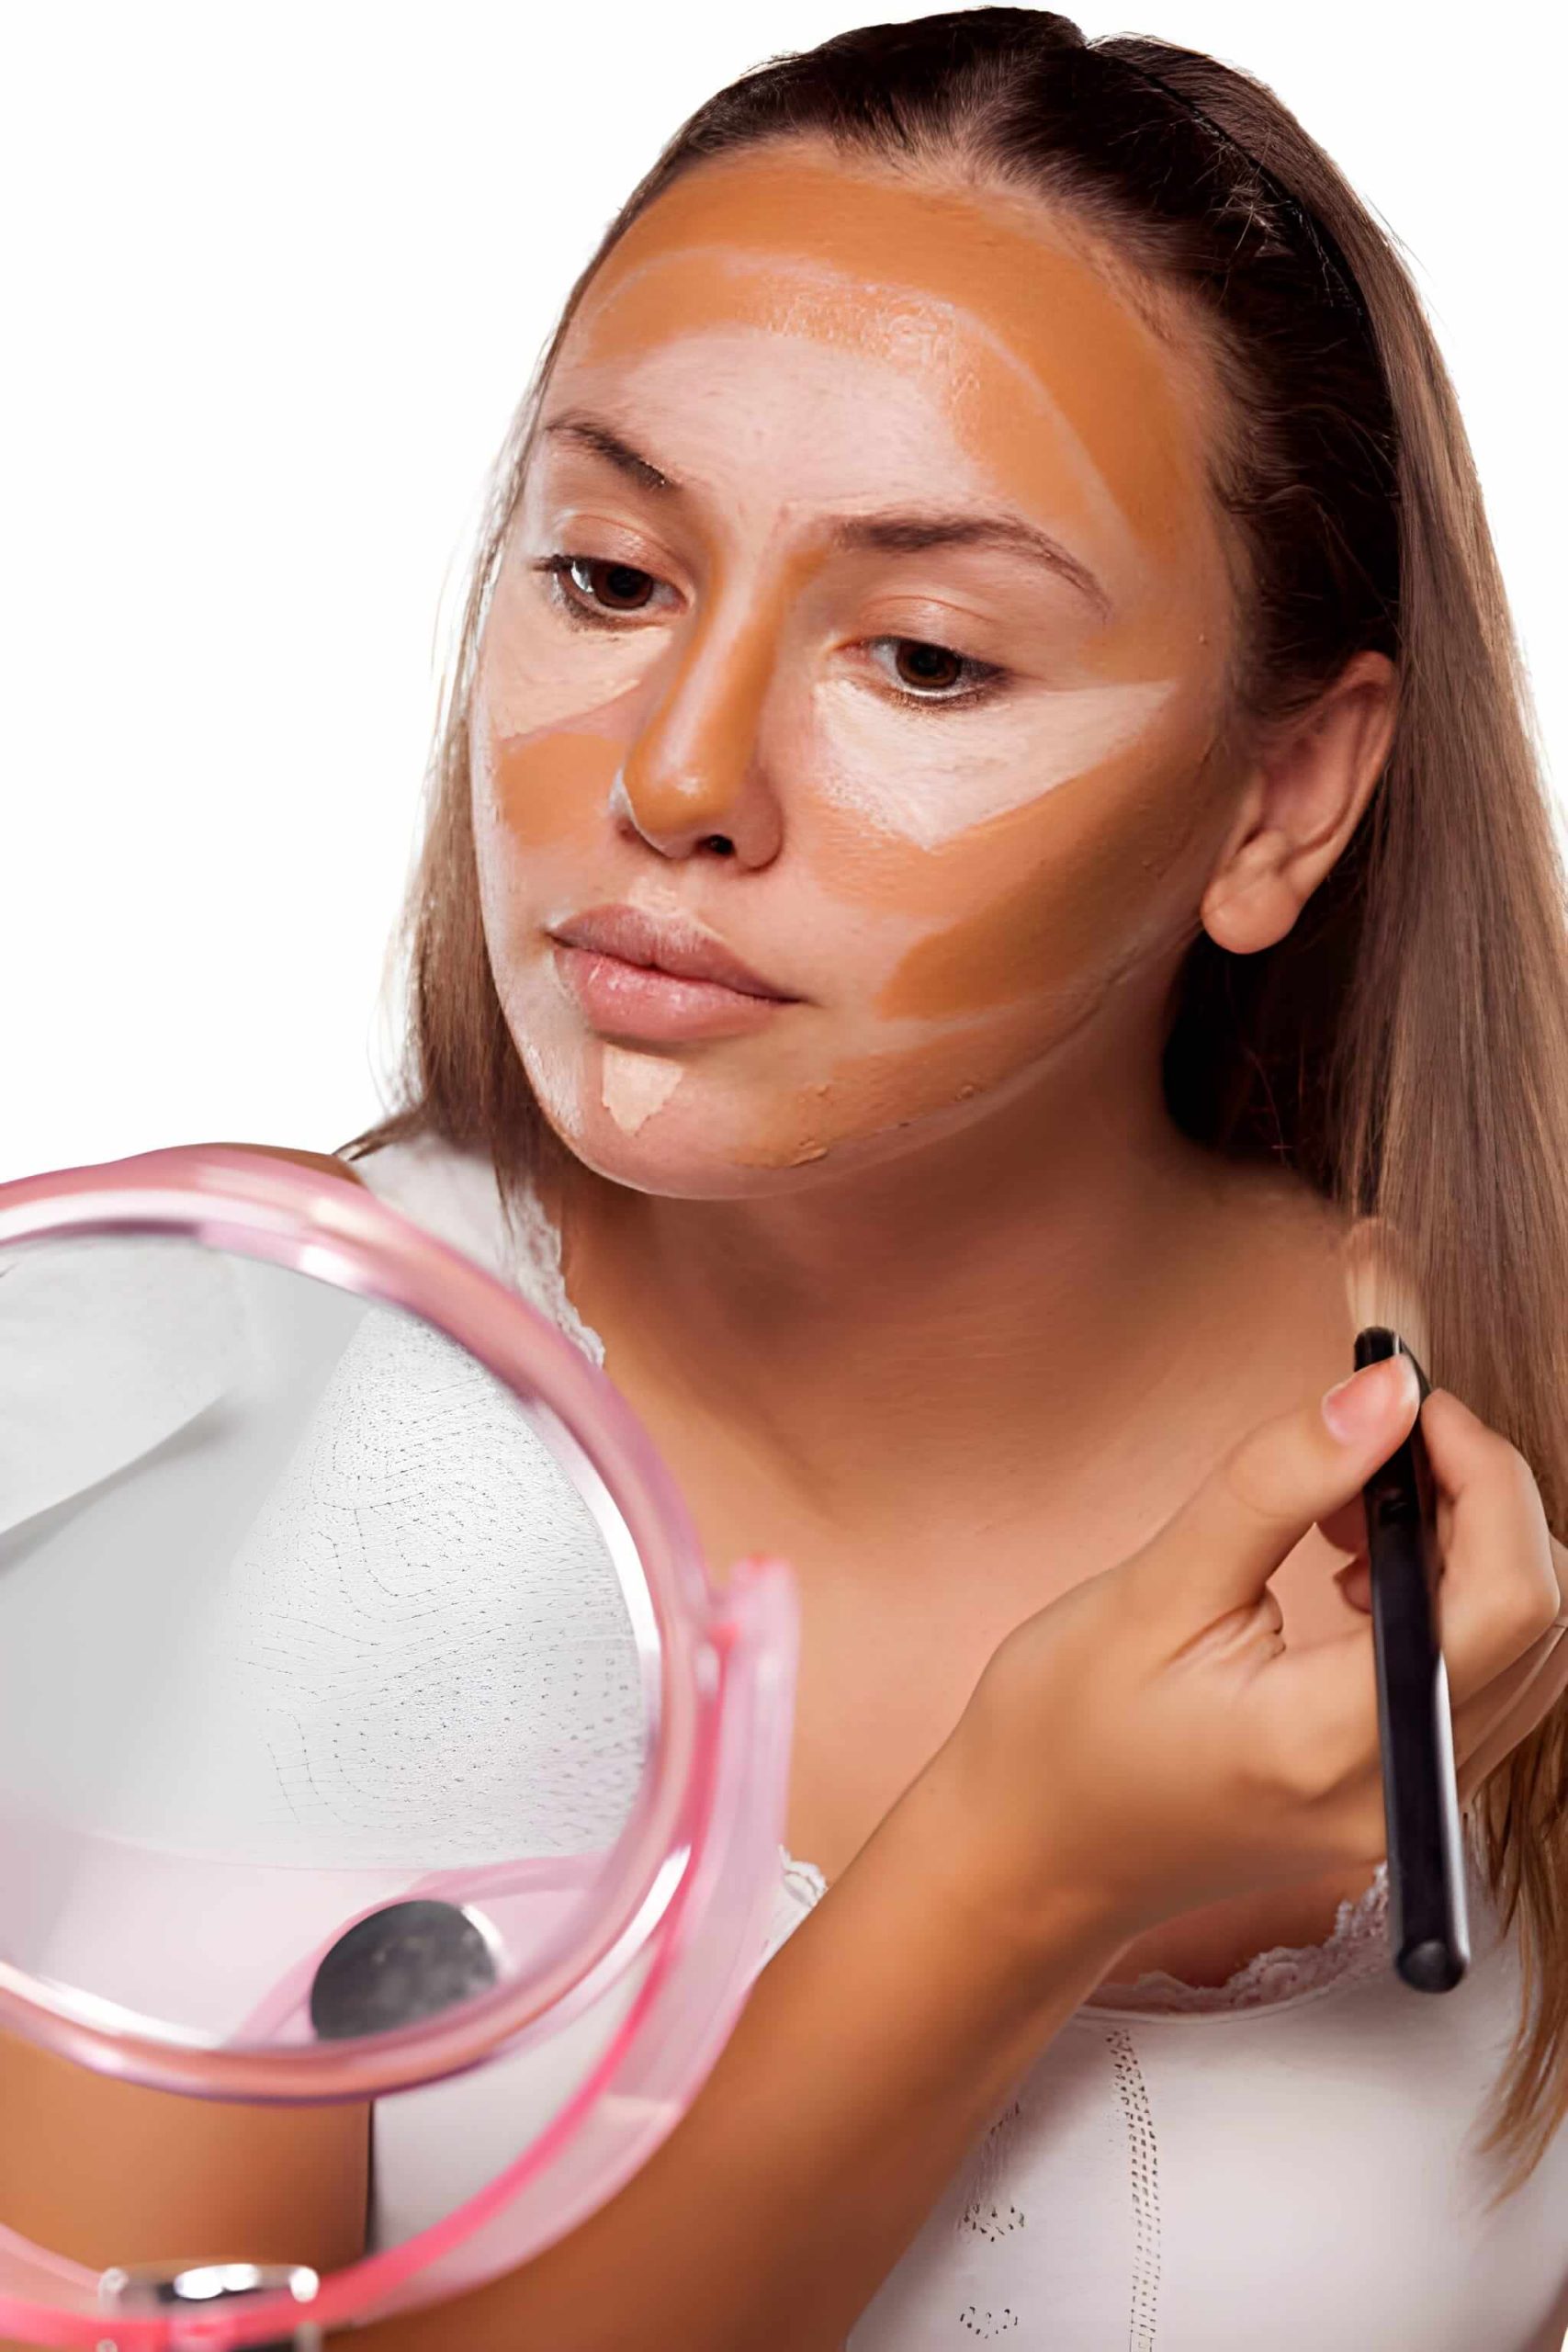
Secret #2: The 3-Zone Focus Method
Here’s a secret pros won’t tell you: you don’t need to contour your entire face. That’s overkill and a massive time-suck.
Focus on three key areas only:
- Cheekbones (hollows of your cheeks)
- Jawline (creates definition)
- Nose (optional but makes a big impact)
That’s it. Forget contouring your forehead, temples, chin, or whatever else the internet told you to do. Those three zones give you maximum impact with minimum effort.
Advertisement
How to find your zones quickly:
- Suck in your cheeks—that hollow is where contour goes
- Feel your jawbone—contour goes right below it
- For your nose, it’s just two lines down the sides
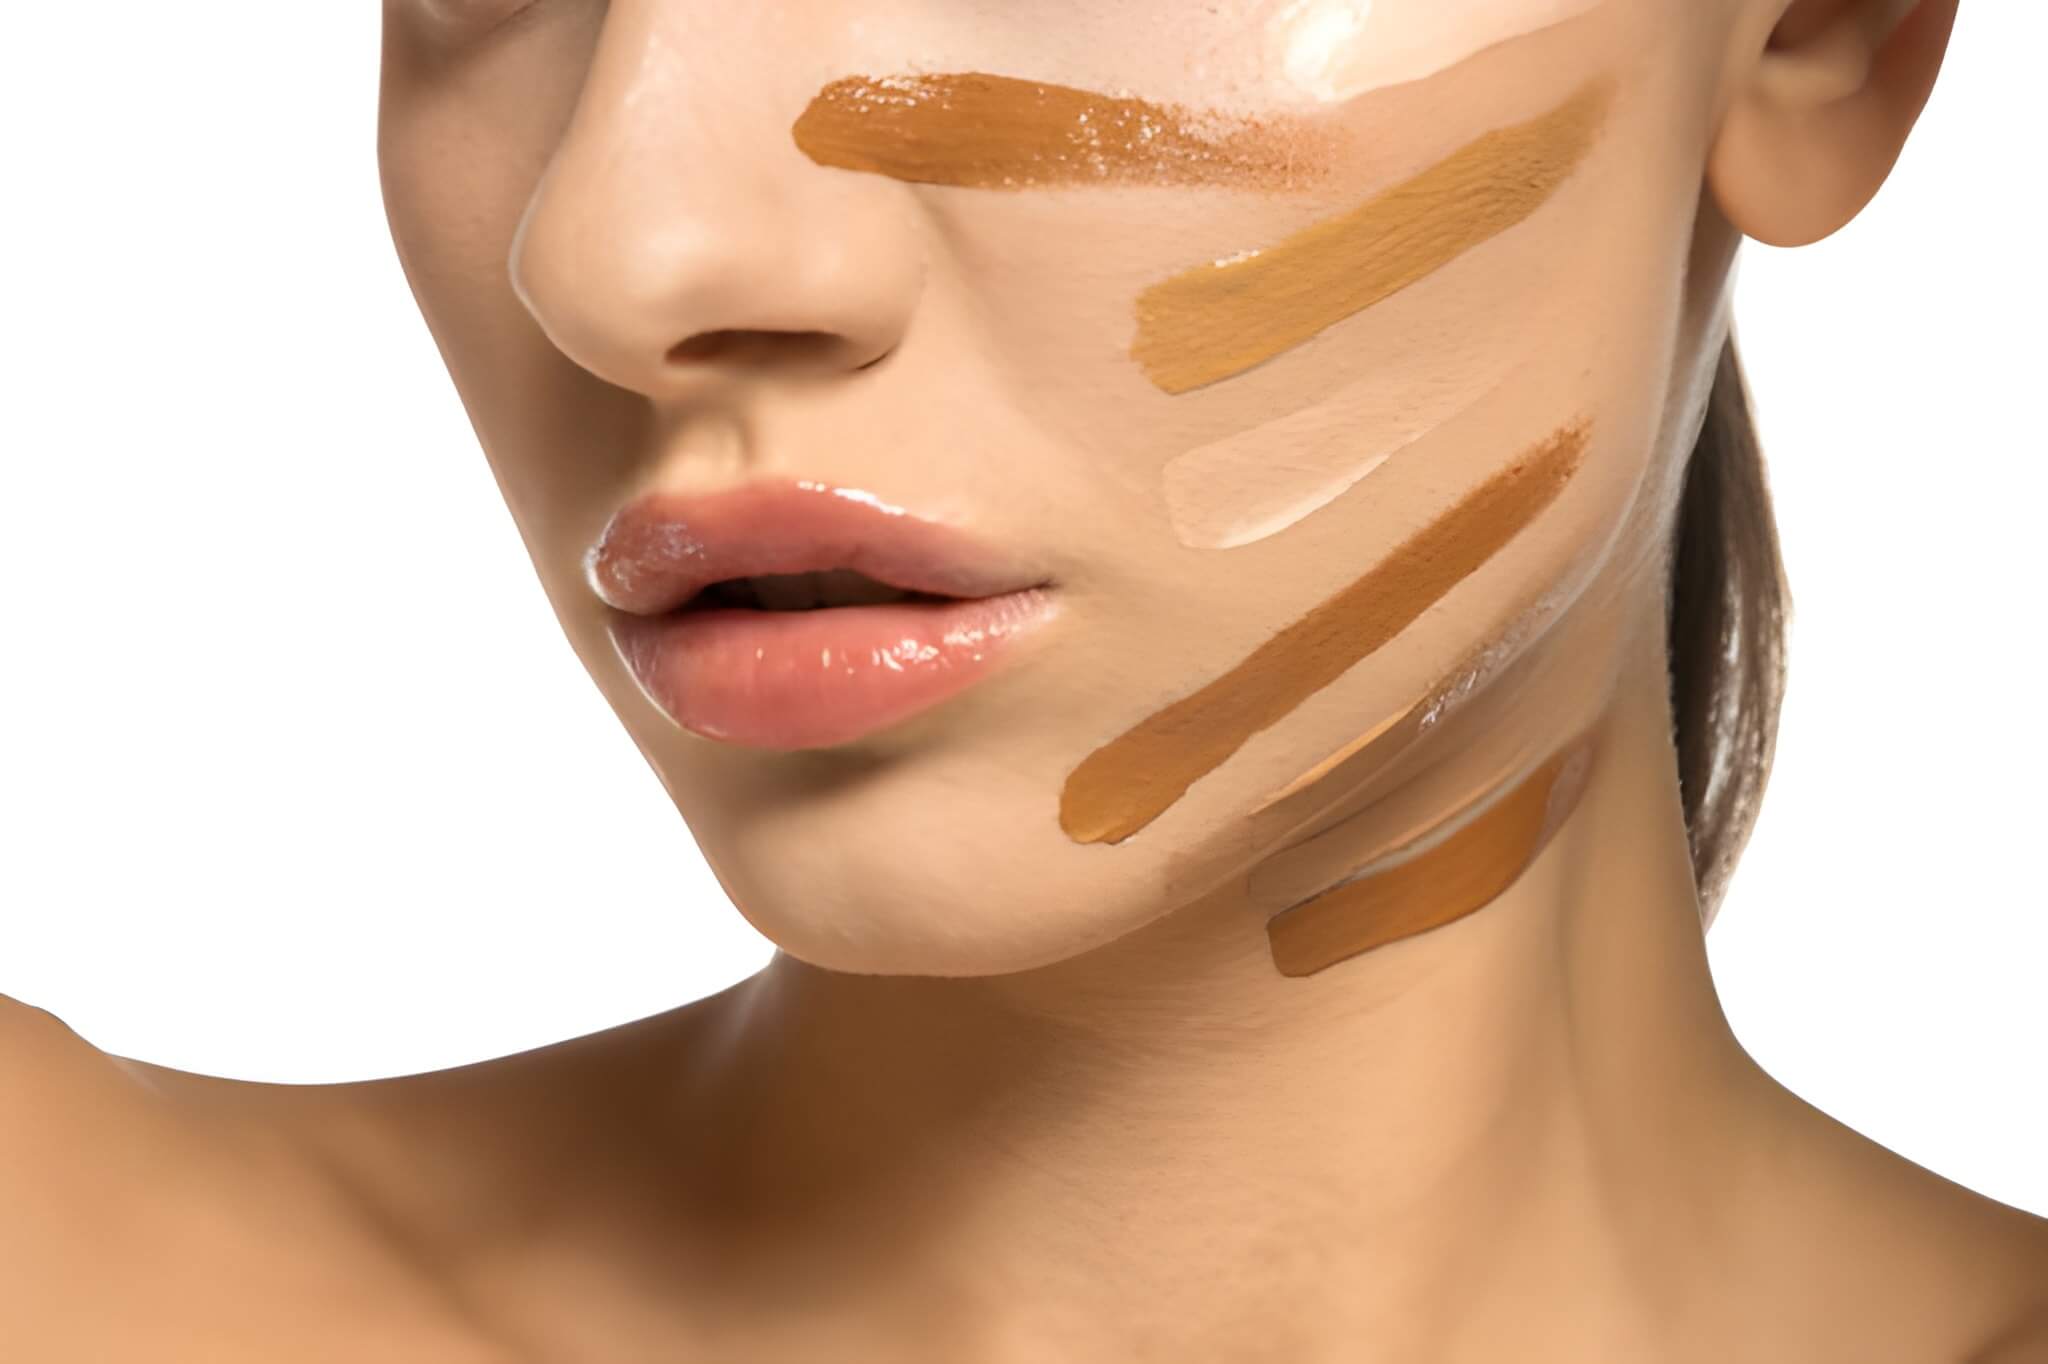
Secret #3: Use the “2-Shades-Darker” Rule
This rule saves lives (and faces). Your contour should be exactly two shades darker than your natural skin tone. Not three, not five—two.
Go darker and you’ll look muddy. Go lighter and it won’t show up. This isn’t the time to experiment with that super dark shade because you saw it on Instagram.
How to test shades quickly:
- Swatch on your jawline in natural light
- The right shade disappears into your skin with minimal blending
- If it looks orange, it’s too warm
- If it looks gray, it’s too cool
Common mistakes:
- Using bronzer as contour (they’re not the same thing)
- Going too warm-toned
- Applying too much product right away
Secret #4: The Speed-Blending Technique
Want to know the real secret to fast contouring? It’s all in the blending tool and technique.
A damp beauty sponge is your best friend here. Seriously, wet that thing and watch how it melts product into your skin in literal seconds. Circular motions work for setting the product, but sweeping motions blend faster.
The trick is to blend the edges, not the entire contour. You want that center line of product to stay dark while the edges fade into nothing. This keeps definition while looking natural.
Pro tip: If you over-blend and lose all definition, don’t restart—just add a tiny bit more product to the center and blend only the new edges.
Secret #5: Contour Before Foundation (Yes, Really!)
I know this sounds backwards, but hear me out. Applying contour before foundation creates the most natural, skin-like finish you’ve ever seen.
Here’s why it works: when you apply foundation over contour, it sheers everything out and makes it look like actual shadows rather than makeup. The foundation blends the edges for you, saving time and creating a seamless finish.
When to use this method:
- When you want a super natural look
- When you’re using cream products
- When you’re doing light, everyday makeup
When to stick with traditional order:
- When you need more dramatic contour
- When using powder products
- When you’re doing full glam
Secret #6: The Jawline Trick That Changes Everything
Here’s what nobody tells you about jawline contouring: placement is everything, and most people get it wrong.
You don’t contour ON your jawbone—you contour in the shadow UNDER it. Run your finger along your jawbone, then drop about half an inch below. That’s your sweet spot.
The exact technique:
- Apply product in a line from your ear toward your chin
- Stop about an inch before your chin (don’t connect it)
- Blend downward toward your neck, not upward
- Use whatever’s left on your sponge to blend into your neck
This creates instant definition without looking like you drew a beard on your face. The key is blending down and out, never up onto your actual jaw.
Secret #7: Nose Contouring in 30 Seconds

Nose contouring seems scary, but it’s actually the easiest part. Two thin lines, that’s it.
Draw one line down each side of your nose, starting from your brow bone. Keep them parallel and thin—we’re talking width of a pencil, not a marker. Then blend outward toward your cheeks, not across the bridge.
Common mistakes:
- Making the lines too wide (instant Avatar vibes)
- Bringing them too far down (stop at the tip)
- Forgetting to blend the top into your brow bone
The whole thing takes 30 seconds once you get the placement right. And honestly? Skip it if you’re really rushed—cheekbones and jawline matter more.
Secret #8: Don’t Forget to Highlight
Okay, this is where the magic really happens. Contour without highlight is like peanut butter without jelly—technically functional but missing something crucial.
Highlight goes opposite your contour:
- Tops of cheekbones (right above where you contoured)
- Bridge of nose (between your contour lines)
- Cupid’s bow (optional but pretty)
You don’t need a blinding highlight for daytime. A subtle, skin-like glow works better and applies faster. Just tap it on with your finger or a damp sponge—done in 20 seconds.
The contour creates shadows, the highlight creates light, and together they create dimension. That’s the whole secret of contouring in one sentence.
Secret #9: The Brush vs. Sponge Debate

Let’s settle this once and for all: for speed, a damp beauty sponge wins every time.
Brushes are great for precision and control, but they require more blending time. A damp sponge bounces product into your skin and melts everything together faster than any brush ever could.
When to use a sponge:
- Cream products
- When you’re in a rush
- For beginners who struggle with blending
When to use a brush:
- Powder products
- When you want more precision
- For buildable, controlled application
Pro tips for both:
- With sponges: Wet them, squeeze out excess, bounce don’t swipe
- With brushes: Use dense, fluffy brushes for powder and stippling brushes for cream
FYI, you can totally use your fingers for cream products. Your body heat helps blend the product, and sometimes that’s the fastest method of all.
Secret #10: Set It and Forget It
You didn’t speed through your contour just to have it disappear by lunch, right? Setting your work takes 10 seconds and makes it last all day.
For powder contour, a light dusting of translucent powder over your whole face locks everything in. For cream, you have two options:
- Setting spray (faster, more natural finish)
- Powder (more matte, longer-lasting)
The trick: Don’t go heavy-handed. A light mist of setting spray or the tiniest amount of powder does the job without disturbing your contour or making you look cakey.
Products that work fast:
- Any setting spray in a fine mist
- Translucent powder with a fluffy brush
- Powder puff for speed (pat, don’t swipe)
Step-by-Step: Your 5-Minute Contour Routine
Let’s put this all together. Here’s your literal five-minute timeline:
Minute 1: Prep and Apply Contour
- Quick primer if your skin needs it (optional)
- Swipe contour product onto cheekbones, jawline, and nose sides
- Don’t blend yet—just get the product down
Minute 2: Blend Cheekbones
- Grab your damp sponge
- Blend cheek contour using sweeping motions from center outward
- Keep that center dark, fade the edges
Minute 3: Jawline and Nose
- Blend jawline downward and outward
- Quick blend on nose sides, outward motion
- Check for harsh lines and soften any you see
Minute 4: Apply Highlight
- Tap highlighter on cheekbone tops and nose bridge
- Quick blend with whatever tool you’re already using
- Add to cupid’s bow if you have extra seconds
Minute 5: Set and Perfect
- Mist with setting spray OR dust with powder
- Quick once-over in the mirror
- Fix any spots that need it (there usually aren’t any)
Visual timeline: 0:00-1:00 → Product application 1:00-2:00 → Cheek blending
2:00-3:00 → Jaw and nose 3:00-4:00 → Highlighting 4:00-5:00 → Setting and check
Common Mistakes That Waste Time
Let’s talk about what NOT to do, because avoiding these mistakes saves you more time than any technique.
Over-contouring: More is not better. You’ll spend forever trying to blend out too much product. Start light, build up if needed. You can always add more; you can’t subtract easily.
Using the wrong tools: A dry sponge is useless. A brush that’s too small takes forever. The wrong tool can literally double your time. Invest in proper tools—they pay for themselves in time saved.
Skipping prep: Trying to contour on dry, flaky skin? Yeah, that’s going to take way longer and look way worse. A quick moisturizer or primer creates a smooth canvas that blends faster.
How to fix mistakes quickly:
- Too dark? Pat foundation or concealer over it to sheer it out
- Harsh lines? Blend the edges more, don’t add more product
- Lost all definition? Add a tiny bit more product to the center only
- Patchy application? Use a damp sponge to even everything out
The biggest time-waster is perfectionism. Your contour doesn’t need to be Instagram-ready for everyday life. Aim for “looks good from three feet away” and you’ll save yourself so much stress 🙂
Conclusion
So there you have it—five minutes to a contoured face that looks like you tried way harder than you actually did. The secret isn’t magic products or expensive tools; it’s knowing where to focus your energy and which steps actually matter.
Remember the key points:
- Focus on three zones only (cheekbones, jawline, nose)
- Use the right formula for your skin type
- Blend smart, not hard
- Highlight is half the magic
- Set it so it lasts
The more you practice this routine, the faster you’ll get. I’m talking maybe three minutes once you have the muscle memory down. You’ll probably find your own shortcuts and preferences along the way—that’s the fun part.
Try this routine tomorrow morning and see how it goes. Time yourself if you want proof that it really takes five minutes (it does). And if you mess up? So what. Wipe it off and try again. Makeup isn’t permanent, and practice makes progress.
Now go forth and contour like the time-crunched, bone-structure-faking genius you are. Your cheekbones will thank you.