
Listen, I know you’ve already got your holiday playlist ready and your tree up (or at least planned in your head). But have you thought about your nails? Because nothing says “I’m ready for the holidays” quite like having festive fingertips that sparkle brighter than your neighbor’s outdoor lights.
Christmas nails aren’t just cute—they’re basically a requirement at this point. Think about it: you’re wrapping gifts, clinking glasses at holiday parties, and taking approximately 500 photos of your holiday cookies. Your hands are literally in every shot. Why not make them look amazing?
I’ve rounded up 25 stunning Christmas nail designs that’ll take you from Thanksgiving dinner straight through New Year’s Eve. Whether you’re a nail art newbie who can barely paint within the lines (no judgment, same) or a pro who owns more nail tools than kitchen utensils, there’s something here for you. Short nails, long nails, almond, square—we’re covering it all.
Ready to get festive? Let’s go.
Classic Christmas Nail Designs
#25 Traditional Red and Green
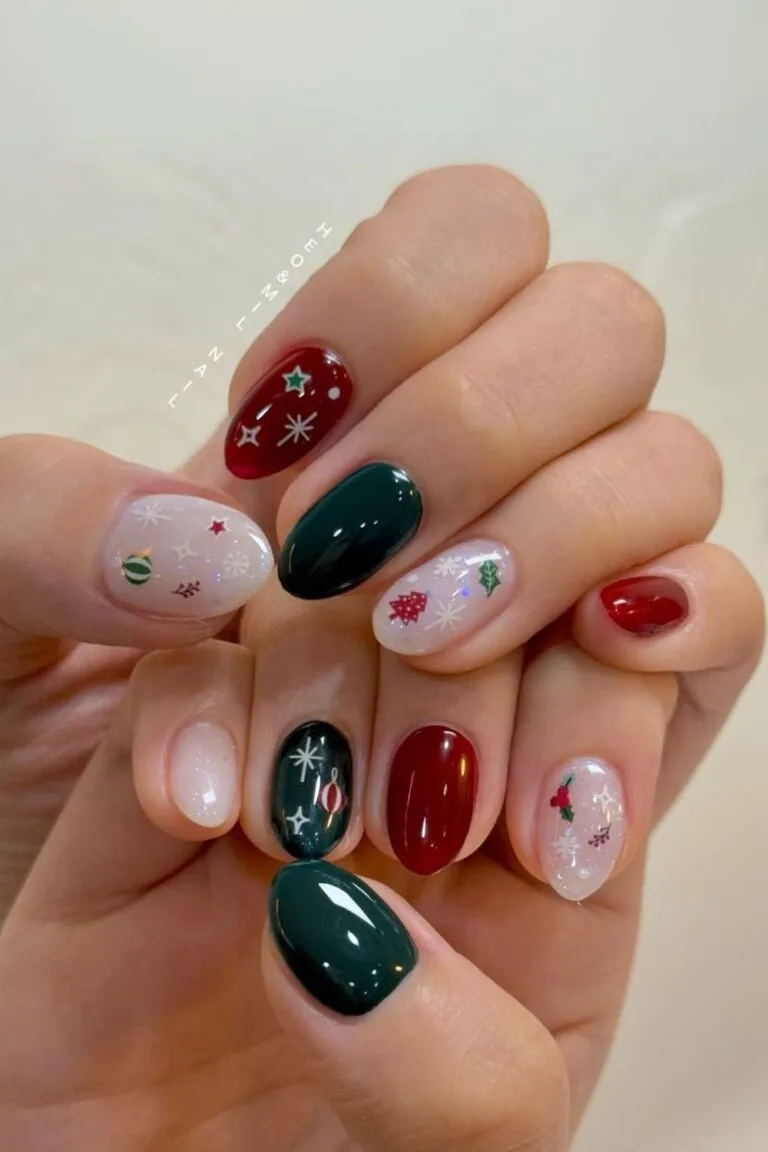
Instagram : @heo_mil_nail
You can never go wrong with the classics, right? Red and green nails are the little black dress of Christmas nail art—timeless, elegant, and they work for literally every holiday event.
Try a simple alternating pattern with red on some nails and deep forest green on others. Add a glossy topcoat, and boom—you’re holiday-ready in under 20 minutes. This look screams “I have my life together” even if you’re stress-eating candy canes while wrapping presents at midnight.
#24 Candy Cane Stripes
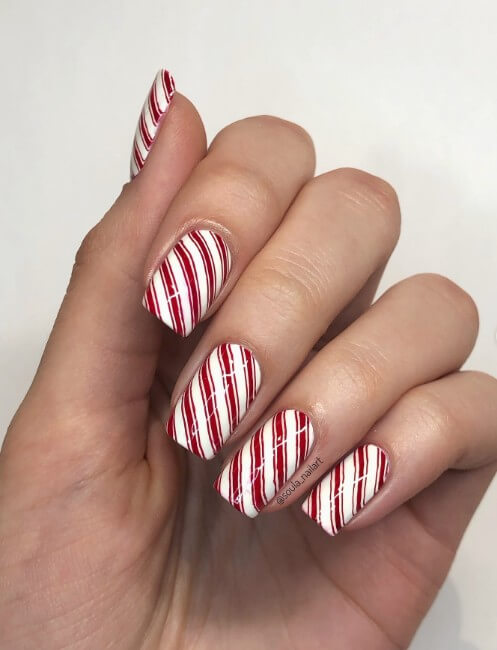
Instagram :@soula_nailart
Okay, candy cane nails are adorable and you know it. The best part? They’re way easier than they look.
Grab some striping tape or a thin brush and create diagonal or vertical red and white stripes. You can do all ten nails for maximum impact, or keep it subtle with just an accent nail or two. Pro tip: let your white base coat dry completely before adding the red stripes, or you’ll end up with a pink mess. Ask me how I know.
Advertisement
#23 Holly and Berries

Instagram : @_nailsbyfallon_
Want to look sophisticated at your office holiday party? Holly and berries are your answer.
Paint your nails a deep red or classic nude, then add tiny green holly leaves and bright red berry dots on one or two accent nails. This design works beautifully on shorter nails and gives off major “I’m elegant and festive without trying too hard” vibes. Pair it with your favorite cocktail dress and watch the compliments roll in.
Advertisement
#22 Christmas Plaid
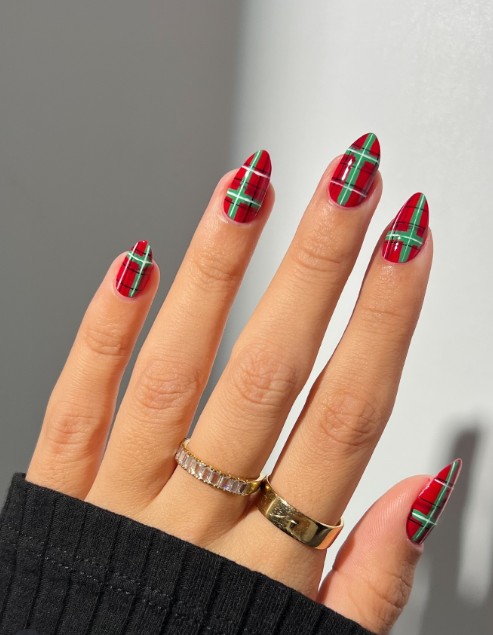
Instagram : @samrosenails
Plaid nails are having a moment, and honestly, I’m here for it. There’s something cozy and festive about buffalo check or tartan patterns on your nails.
The classic red and black combo is gorgeous, but don’t sleep on red and white or green and navy. Use thin striping brushes or nail vinyls if you want crisp lines. Fair warning: this design takes patience, but the Instagram-worthy results are totally worth it.
#21 Classic French Tips with a Twist
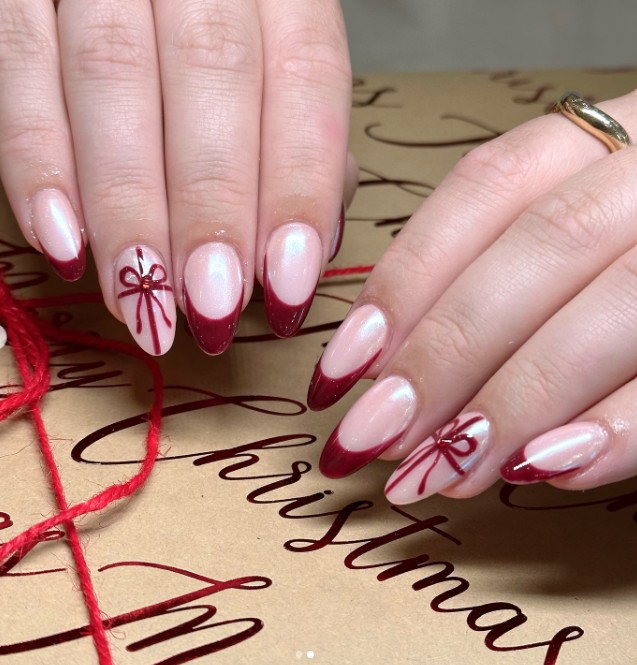
French tips but make them festive? Yes, please.
Swap the traditional white tips for gold, red, or sparkly green and suddenly your go-to manicure is holiday-approved. This works on any nail length and shape, and it’s subtle enough for conservative workplaces while still being fun. FYI, this is my personal favorite for Christmas events where I want to look polished but not over-the-top.
Sparkle & Glitter Designs
#20 Gold Glitter Ombre
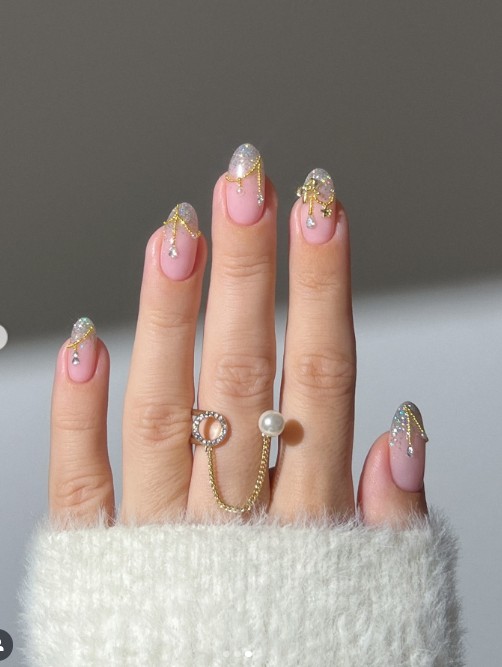
Instagram : @heygreatnails
If you’re hitting up holiday parties, you need glitter. And not just any glitter—gold glitter ombre that fades from nude or champagne at the base to full-on sparkle at the tips.
This look photographs like a dream and catches the light every time you move your hands. Apply your glitter polish with a makeup sponge for that perfect gradient effect. Trust me, you’ll feel like a holiday queen every time you catch a glimpse of your nails.
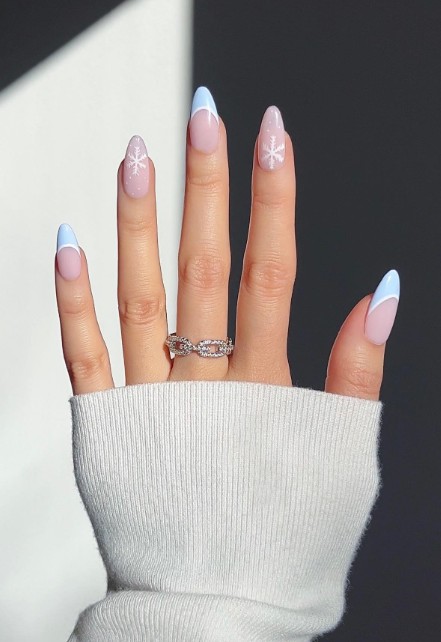
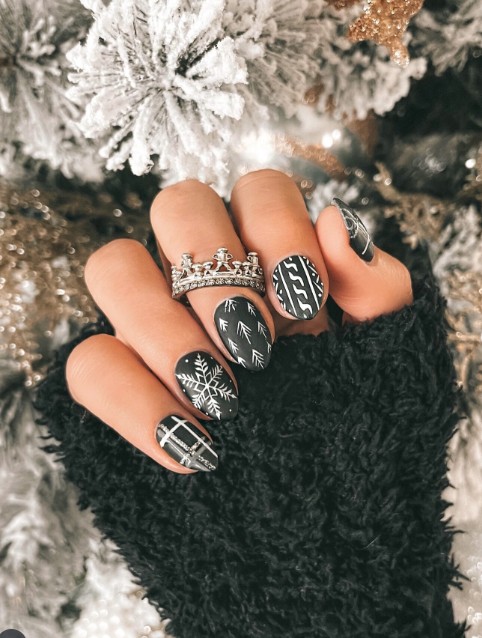
#19 Silver Snowflake Sparkle
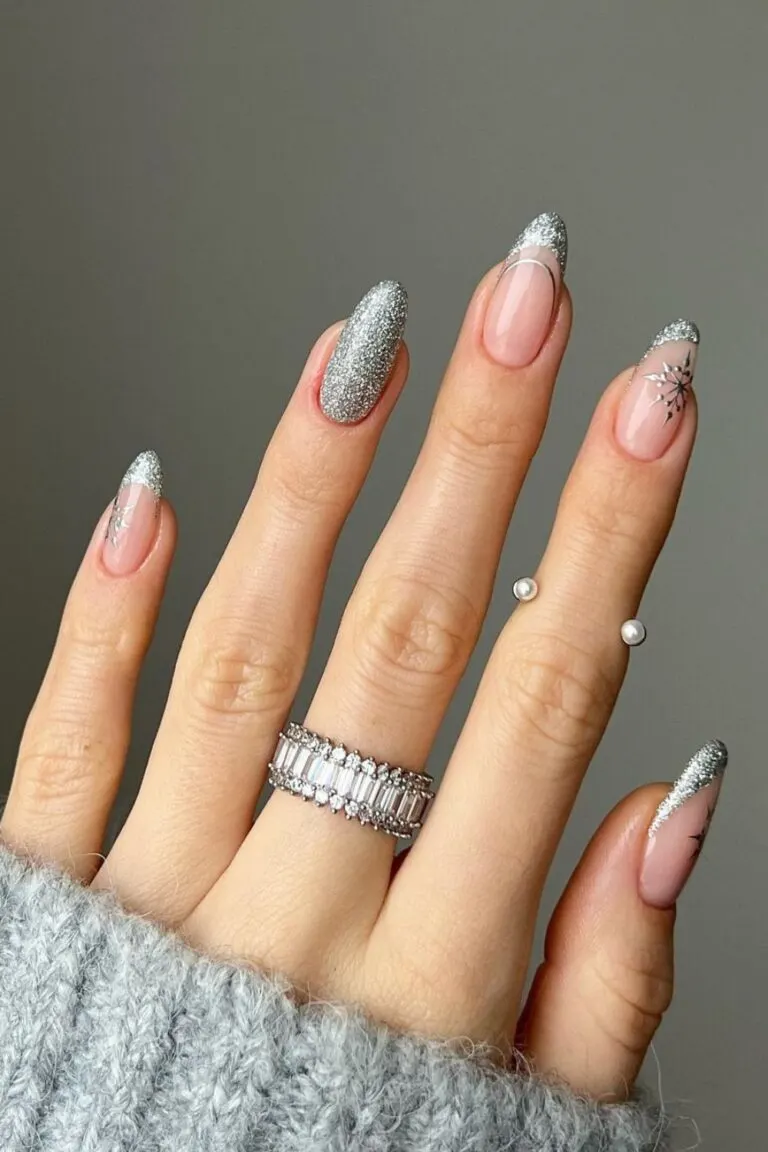
Nothing says winter wonderland quite like silver snowflakes dancing across your nails.
Start with a light blue, white, or nude base, add some silver glitter polish, and finish with delicate snowflake decals or hand-painted designs. This look is icy, elegant, and perfect for those of us who love winter but could do without the actual cold weather.
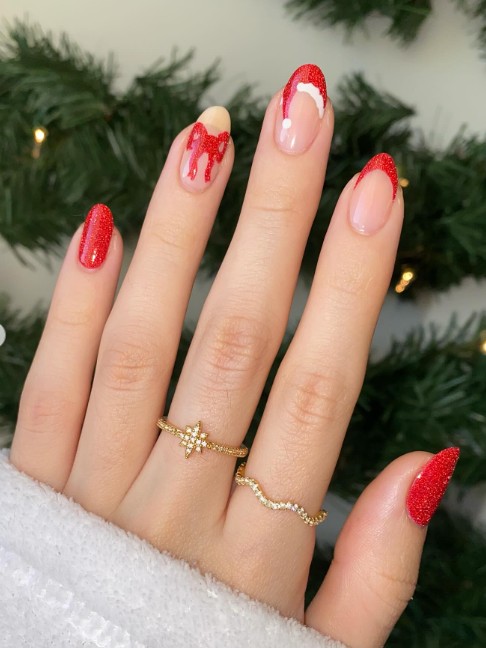
#18 Red Glitter Accent Nails
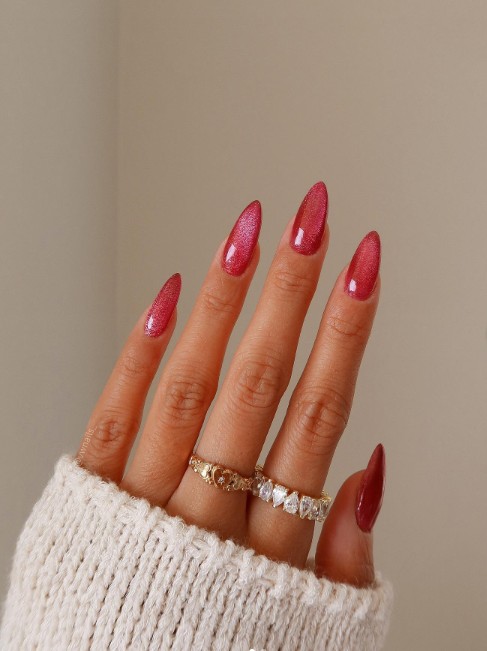
Instagram : vivianmariewong
Sometimes you want sparkle but not too much sparkle, you know?
Paint most of your nails a gorgeous deep red, then go all out with chunky glitter polish on your ring fingers or thumbs. This gives you that festive glam without looking like you stuck your fingers in a craft store explosion. It’s the Goldilocks of Christmas nails—just right.
#17 Champagne Chrome
Instagram : prettymuch_nails
Champagne chrome nails are sophisticated, modern, and honestly kind of luxurious.
This metallic finish looks expensive (even if you DIY it at home for $10). The reflective quality catches light beautifully, making your hands look elegant in every holiday photo. Pair it with literally any outfit and you’re good to go.
#16 Multi-Color Glitter Bombs
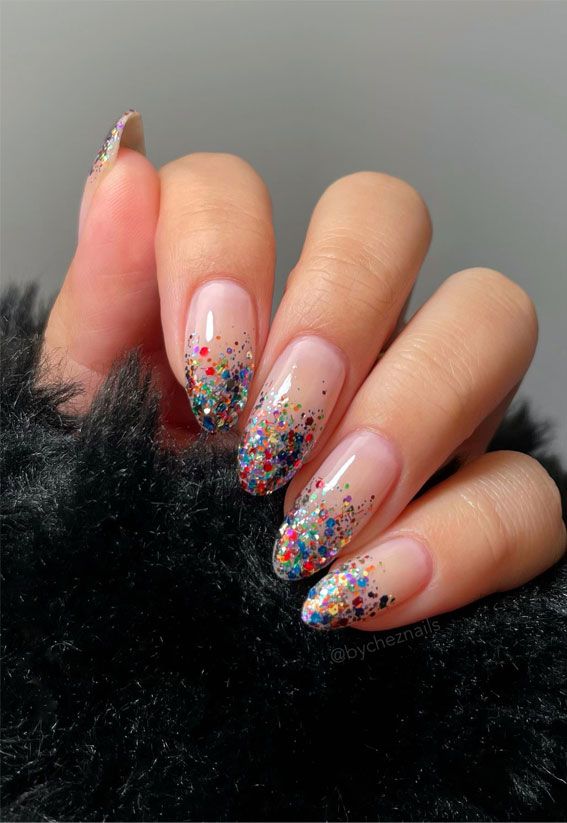
Go big or go home, right? Multi-color glitter nails are for those of us who believe more is more during the holidays.
Mix red, green, gold, and silver glitter over a clear or white base for that festive confetti effect. This look is playful, fun, and perfect for anyone who isn’t afraid of a little sparkle in their life. Kids especially love these—my niece wouldn’t stop staring at mine last Christmas 🙂
Festive Character & Icon Designs
#15 Santa Hat Nails
Instagram : polished_yogi
How cute are Santa hat nails, though? Seriously.
Paint most nails red, add a white band near the tip and a white dot for the pom-pom, and you’ve got an adorable Santa hat design that takes maybe 10 minutes. This is perfect for anyone who wants fun, festive nails without complicated nail art skills.
#14 Reindeer Accent Nails
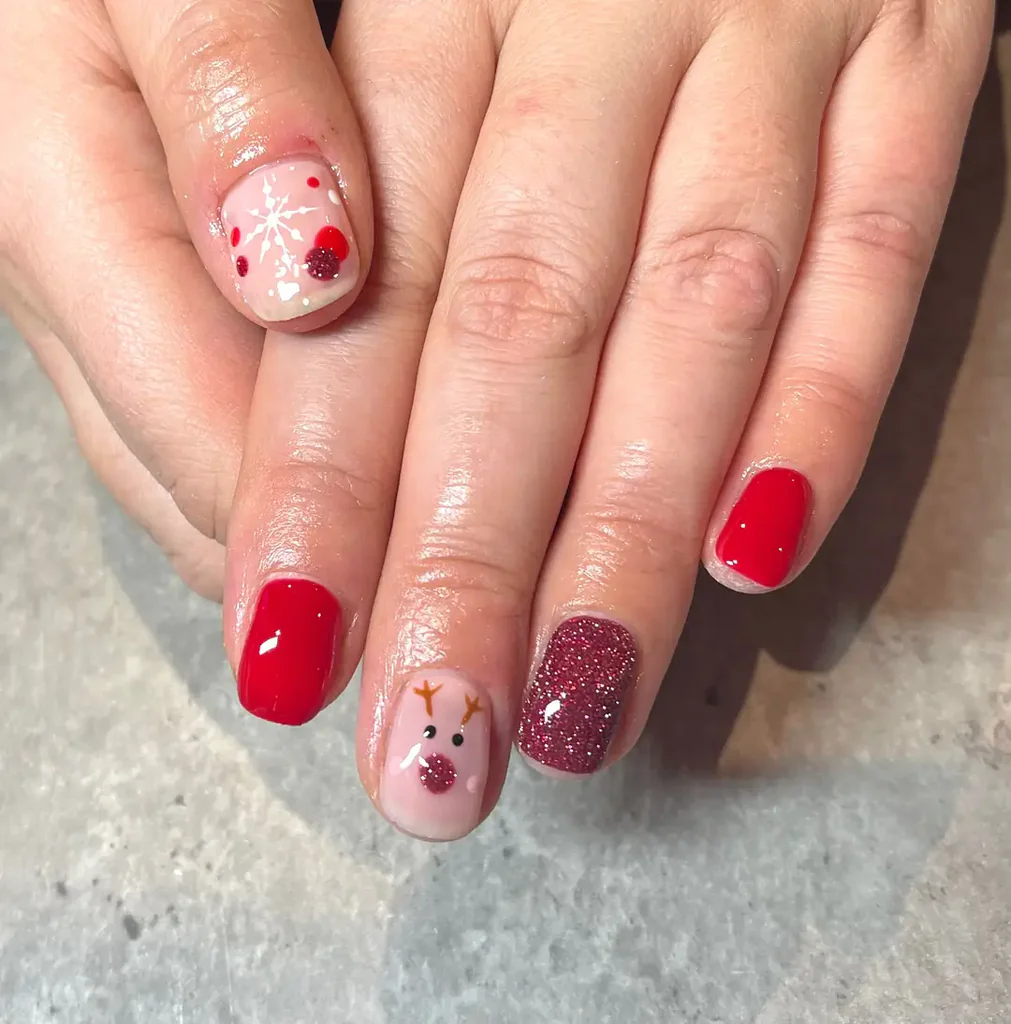
Instagram : prettylittlesalon
Rudolph deserves his moment in the spotlight, and your accent nail is the perfect place.
Create a simple reindeer face on one or two nails using brown polish, small antlers, googly eyes (yes, they make nail-sized ones), and don’t forget that red nose! This design is whimsical without being childish, which is a tricky balance to strike.
#13 Snowman Nails
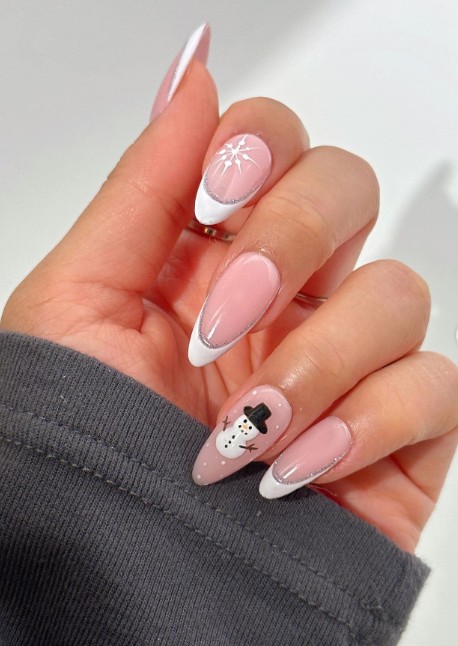
Instagram : pearliepressed
Building a snowman on your nails is way easier than building one in your yard, and your fingers won’t get cold.
Use white polish as the base, add some tiny black dots for eyes and buttons, an orange toothpick or dotting tool for the carrot nose, and maybe a little scarf detail if you’re feeling ambitious. Snowman nails are cheerful and perfect for anyone who loves winter but isn’t super into traditional Christmas colors.
#12 Gingerbread Man Nails
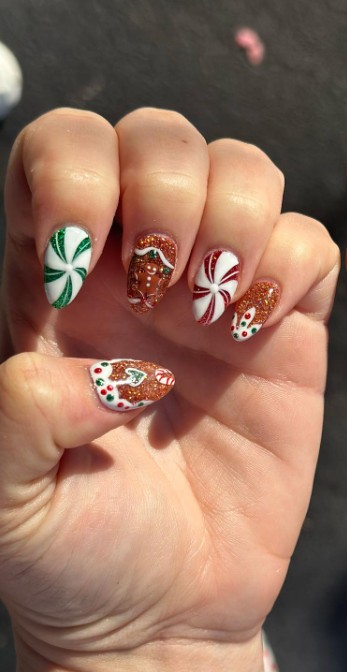
Instagram : hoclouisville
Sweet, whimsical, and absolutely adorable—gingerbread man nails hit different.
Paint a gingerbread brown base and add white icing details with a thin brush or white nail art pen. Add tiny dots for buttons and a smile, and suddenly you’ve got the cutest Christmas nails ever. Bonus: they’ll make you crave actual gingerbread cookies, so plan accordingly.
#11 Christmas Tree Nails
Instagram : nailsbyalsn
You can go full-on detailed Christmas tree or keep it minimalist—both work beautifully.
For a simple version, paint a green triangle on a nude or white base and add a tiny star or dots for ornaments. Want to go all out? Create a detailed tree with ornaments, tinsel, and a star on top. Christmas tree nails work on any nail length and are instantly recognizable as festive.
Elegant & Sophisticated Looks
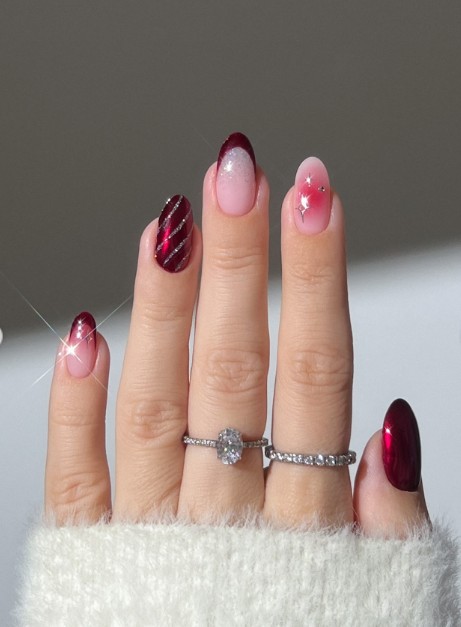
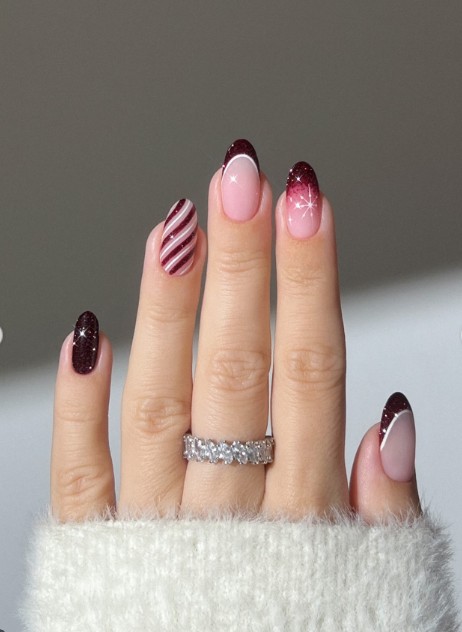
#10 Deep Burgundy with Gold Foil
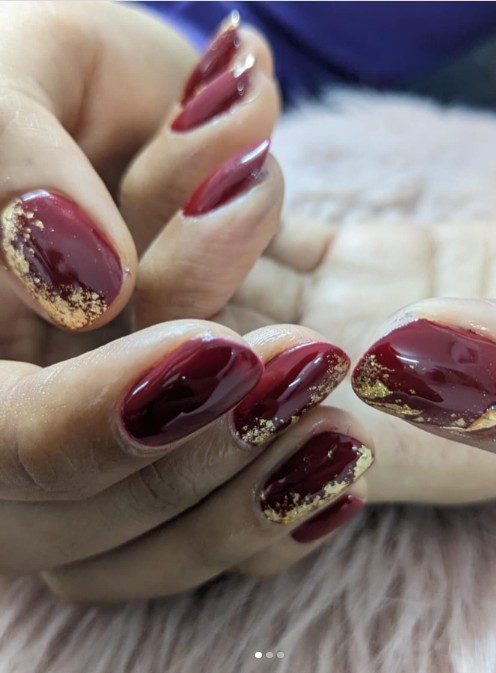
Instagram : polishmesplendid
This combination is chef’s kiss for elegance.
Deep burgundy is rich and sophisticated on its own, but add some random gold foil flakes and you’ve got something truly special. This look works for both casual holiday gatherings and fancy events. IMO, this is the most versatile design on this entire list.
#9 Navy Blue with Silver Stars
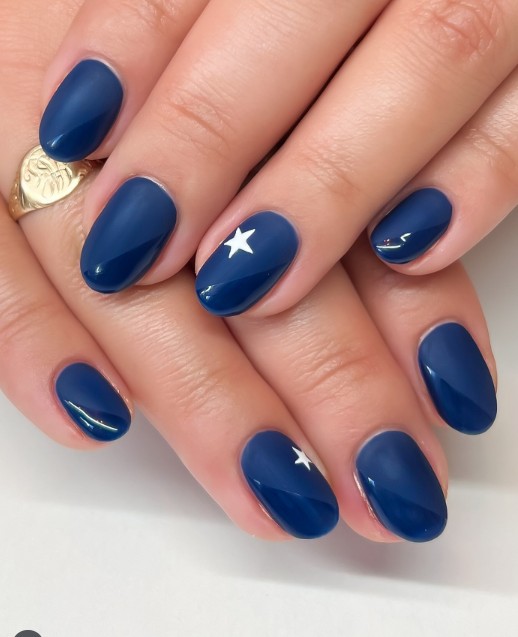
Instagram : nailexecutive
Is it necessary for Christmas nails to be red and green? Navy blue is surprising and elegant.
Add some silver star accents and suddenly you’ve got a celestial holiday vibe that’s both festive and unique. This color combo works especially well if you’re tired of traditional Christmas colors but still want to feel festive. Plus, it matches basically every winter outfit.
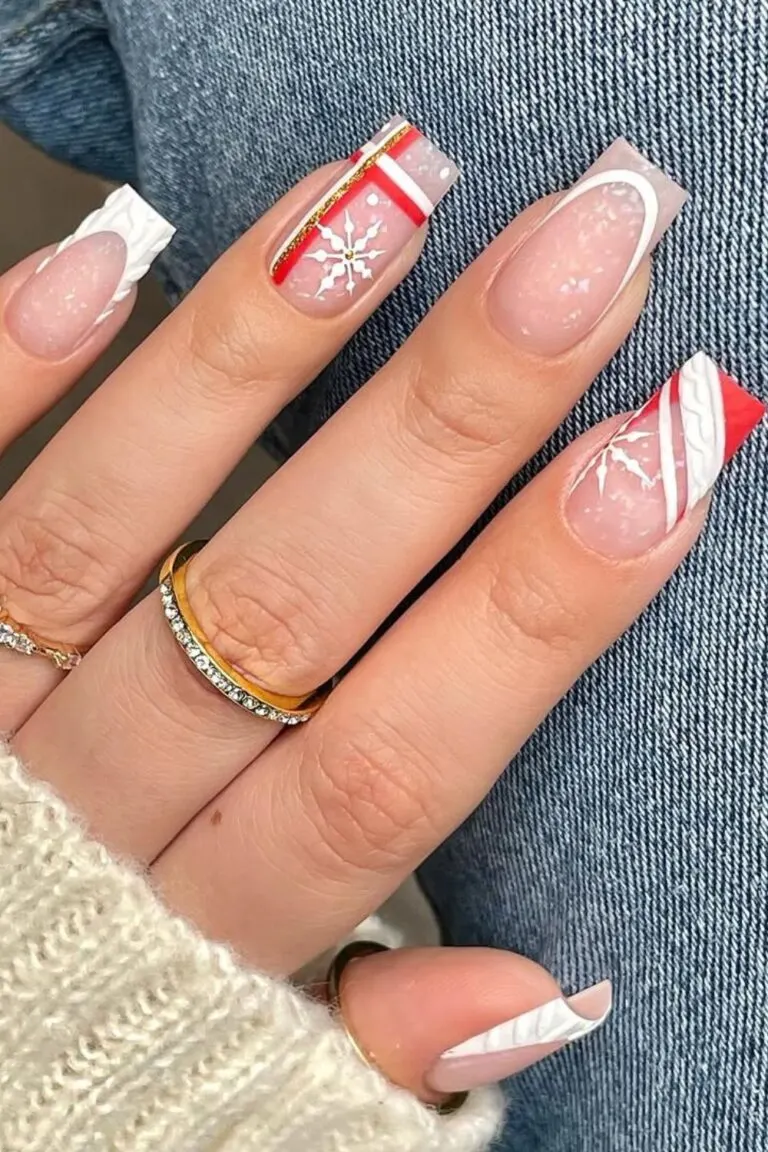
#8 White Winter Wonderland
Instagram : nailsbyalsn
Minimalist and elegant, white nails with delicate snowflake details are perfection.
This look is clean, sophisticated, and works in professional settings where you can’t exactly show up with Santa faces on your nails. Add some subtle shimmer or tiny silver snowflakes, and you’ve got a winter wonderland on your fingertips.
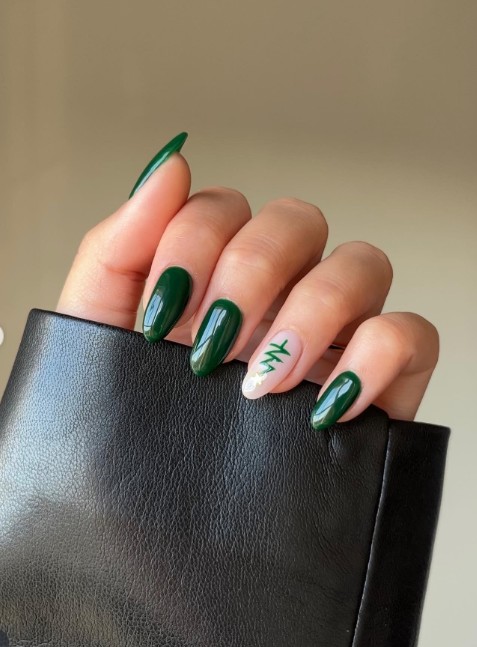
#7 Emerald Green Jewel Tones
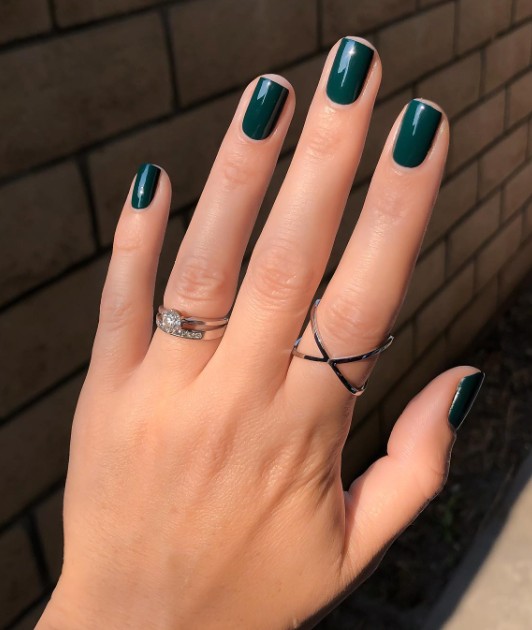
Instagram : lovefreshpaint
Sometimes a gorgeous solid color is all you need, and emerald green absolutely delivers.
This jewel tone is festive without being too Christmas-y, which means you can rock it well into January without looking like you forgot to change your nails. Add a glossy topcoat for that gemstone effect, and your nails will look expensive AF.
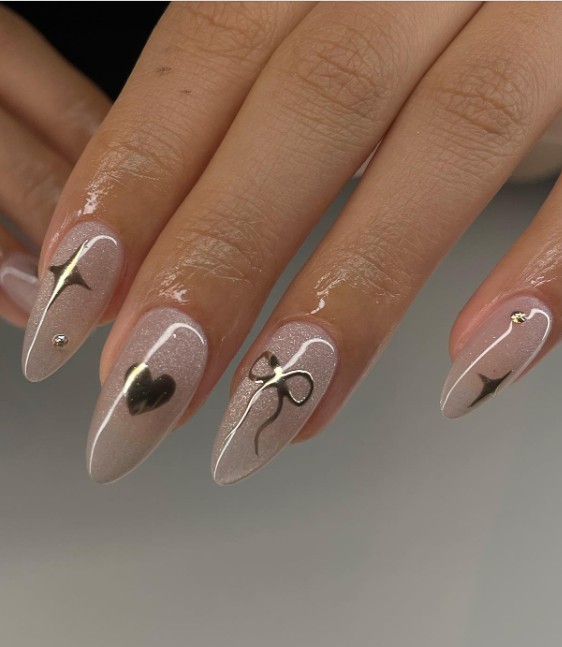
#6 Rose Gold Elegance
Rose gold is the perfect metallic for anyone who finds regular gold too yellow and silver too cool-toned.
This modern metallic alternative is warm, festive, and incredibly versatile. You can wear it alone for understated elegance or use it as an accent color with white or burgundy nails. Either way, you’ll look polished and put-together.
Trendy & Modern Designs
#5 Negative Space Christmas
Instagram : topcoatchronicles
Negative space designs are having a major moment, and Christmas nails are no exception.
Leave parts of your natural nail visible and add festive designs like tiny trees, stars, or geometric patterns on the exposed areas. This contemporary approach is minimalist yet festive—perfect for the modern nail enthusiast who wants something different.
#4 Abstract Holiday Swirls
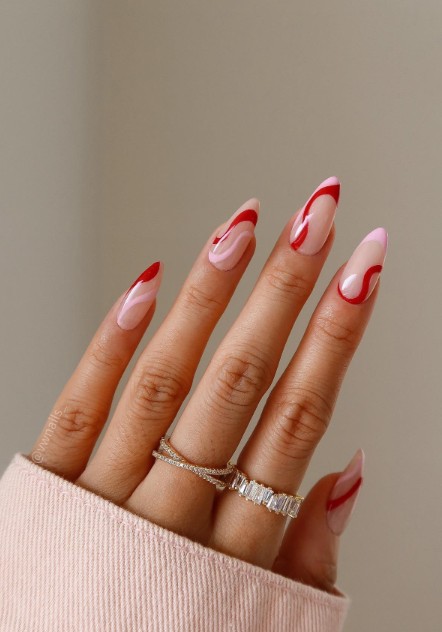
Instagram : vivianmariewong
Not feeling the traditional Christmas imagery? Abstract designs are your friend.
Create swirls and shapes using Christmas colors—think red, green, white, and gold mixed in artistic, non-traditional patterns. This look is perfect for anyone with an artsy vibe who wants festive nails that don’t scream “I LOVE SANTA.”
#3 Matte Finish with Glossy Accents
Instagram : @nailzkatkat
The texture contrast here is everything.
Paint your nails with matte polish in Christmas colors, then add glossy accents like stripes, dots, or geometric shapes. The different finishes create visual interest without needing complicated designs. This technique works with literally any color combo and looks way more complex than it actually is.
#2 Ombre Christmas Colors
Instagram : heygreatnails
Ombre nails are always gorgeous, but Christmas colors take them to the next level.
Try a gradient from red to green across your hand, or go for white fading into silver for an icy effect. You’ll need a makeup sponge and a bit of patience, but the results are stunning. Fair warning: this can get messy, so keep some nail polish remover and a cleanup brush handy.
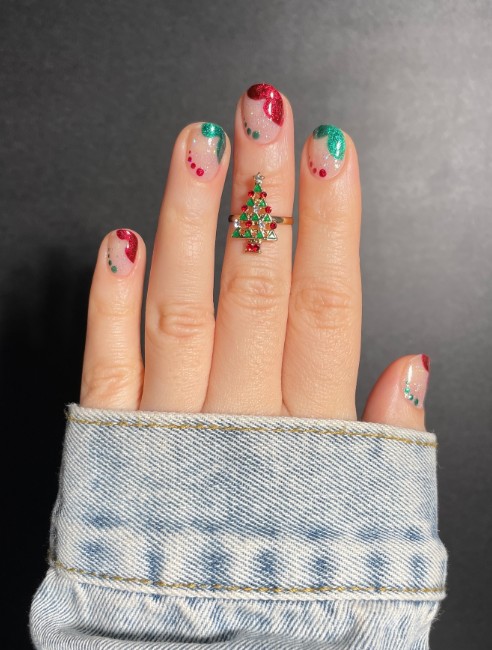
#1 Mixed Pattern Christmas
Instagram : dtkaustin
Why choose one design when you can have them all?
Combine multiple patterns across your nails—maybe candy cane stripes on your thumb, a Christmas tree on your ring finger, red glitter on your middle finger, and solid green on the rest. This look is fun, eclectic, and perfect for indecisive people like me who want all the festive vibes at once.
Tips for Perfect Christmas Nails
Okay, so you’ve picked your design (or three, because narrowing it down is impossible). Now let’s make sure your manicure actually lasts through all those holiday parties.
Preparation: Start with a Clean Canvas
Don’t skip the prep work—I know it’s boring, but it matters.
Push back your cuticles, file your nails into your desired shape, and buff the surface slightly to remove any oils. Wash your hands thoroughly and let them dry completely before applying any polish. This extra five minutes means your manicure will last way longer.
Longevity: Make It Last
Nothing’s sadder than gorgeous nails that chip on day two.
Always use a base coat to protect your natural nails and help the polish adhere. Apply thin layers of color (two coats is usually perfect), letting each layer dry completely. Finish with a good topcoat and reapply that topcoat every few days. Also? Wear gloves when doing dishes or cleaning. Your future self will thank you.
DIY vs. Salon: What’s Right for You?
This depends entirely on your budget, skill level, and time.
DIY is obviously cheaper and you can do it in your pajamas at midnight (been there, done that). But salons give you access to professional techniques and tools you probably don’t own. My advice? Start with DIY for simpler designs and splurge on a salon visit for complex nail art or special occasions.
Tools & Products:
You don’t need a million products, but having the right tools helps.
At minimum, grab a good base coat, your chosen colors, a quality topcoat, and some nail polish remover. For nail art, invest in a thin striping brush, dotting tools, and maybe some nail tape or stencils. Amazon has tons of affordable nail art kits that include everything you need. Quick tip: Sally Hansen and OPI make solid drugstore options that won’t break the bank.
Removal: Especially Important for Glitter
Let’s be real—removing glitter polish is the worst.
For regular polish, soak a cotton ball in remover, press it onto your nail for 10 seconds, then wipe. For glitter polish (because you definitely tried at least one glitter design from this list), use the foil method: soak a cotton ball, place it on your nail, wrap your fingertip in aluminum foil, wait 5-10 minutes, then remove. This saves you from scrubbing your nails raw trying to get every sparkle off.
Make This Holiday Season Sparkle
There you have it—25 gorgeous Christmas nail designs that’ll keep your fingertips festive from the first snow until the ball drops on New Year’s Eve.
Whether you went classic with red and green, got glamorous with gold glitter ombre, or created an entire snowman on your accent nails, your hands are going to look amazing in all those holiday photos. And honestly? Every time you look down at your festive nails, you’ll get a little mood boost. That’s the magic of holiday nail art.
Which design will you try first? Are you team classic Christmas colors or team modern metallics? Maybe you’re feeling bold enough to mix multiple patterns? Whatever you choose, I want to see it! Tag your Christmas nail photos on social media and share your festive creations with us.
Now if you’ll excuse me, I need to figure out which of these 25 designs I’m trying first. (Who am I kidding? I’ll probably try five of them before Christmas even arrives.)
Happy holidays, and may your nails be merry and bright!