
4. Feline Minty Green Liner & Metallic Eyeshadows (Eye Makeup Look 3)
Looking for an eye makeup look that’s bold, playful, and feminine? Give this a go!!! If you don’t like mint green, a blue eyeliner like Marc Jacobs’ Highliner Gel Eye Crayon Eyeliner in (Wave)Length might be used instead.
To get this look, you’ll need the following items:
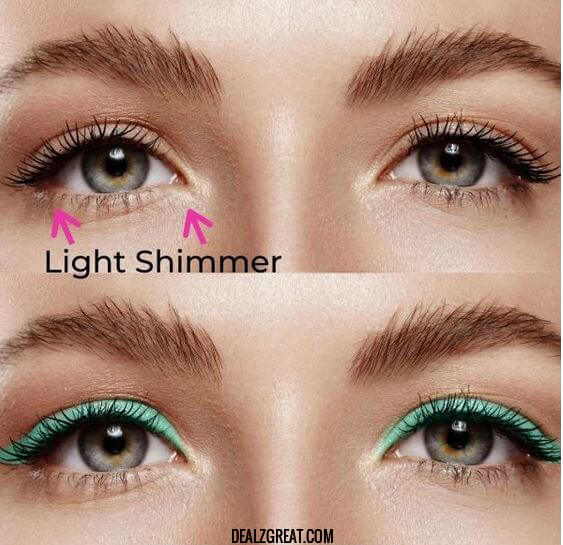
- Optional , Light Shimmer Eyeshadow Shade
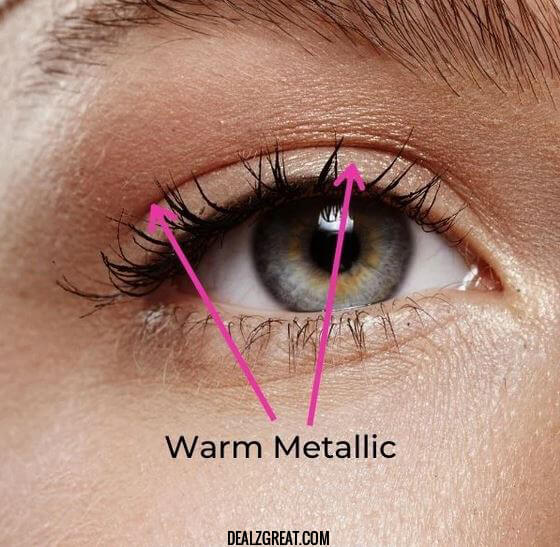
- Warm Metallic Eyeshadow Shade
- Mascara
- Mint Green Eyeliner
Our Top Picks:
1. Shades of Warm Metallic and Light Shimmer:

2. Eyeliner

Steps to a Feline Minty Green Liner and Metallic Eyeshadow Look:
1st step
Apply your primer to your lids (you can also use it beneath your lower lashes). Allow it to dry before moving on to the next stage. If you don’t want to use a primer, you can cover your eyes with foundation and concealer. After that, use a translucent powder to set it.
2nd Step
Apply a little layer of the warm metallic colour to your eyelid as a base and merge just above your crease. Blend this out with your blending brush until it’s just a faint wash of color.
3rd step
Apply the light shimmer eyeshadow shade to your lower lash line and softly to the skin region right around your inner tear duct with your smudge brush, tiny shader brush, or pencil brush.
Instead of using a new shade here, you may just use the same eyeshadow color you used in Step 2 if you like (above).
4th step:
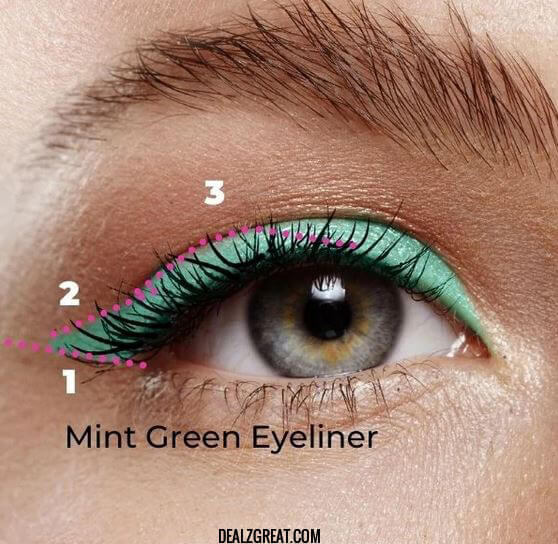
Apply your mint green eyeliner to your top lid along the whole lash line at this point.
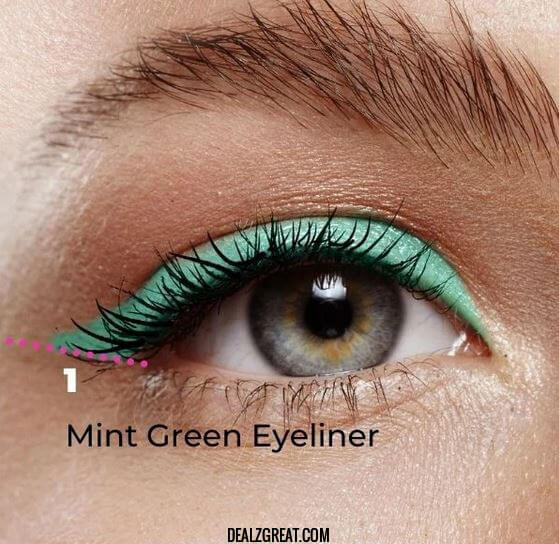
Starting at the outside corner of the eye and tracing inward is what I think works best. You’ll want to start with the film. Extend your first line from the outside edge at an angle. If you’re going to use a cream liner, make sure to apply it using an angled brush.

Advertisement
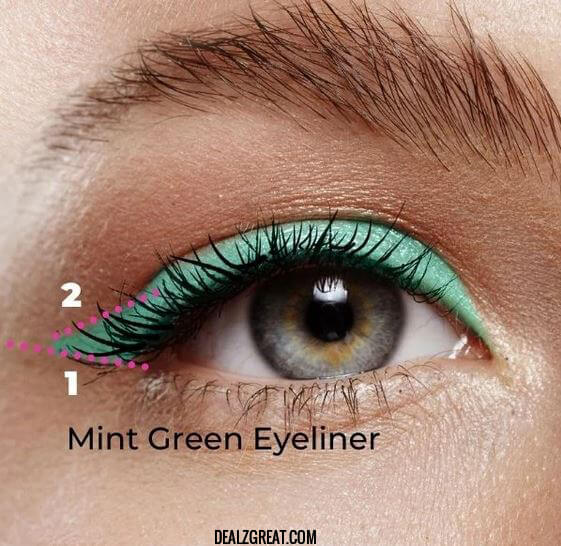
5th step:
Draw a second line from the border of that line back towards your lash line. This results in the formation of a little triangle.
6th step:
You may now go back and fill in the two small triangles with your green.
7th step:
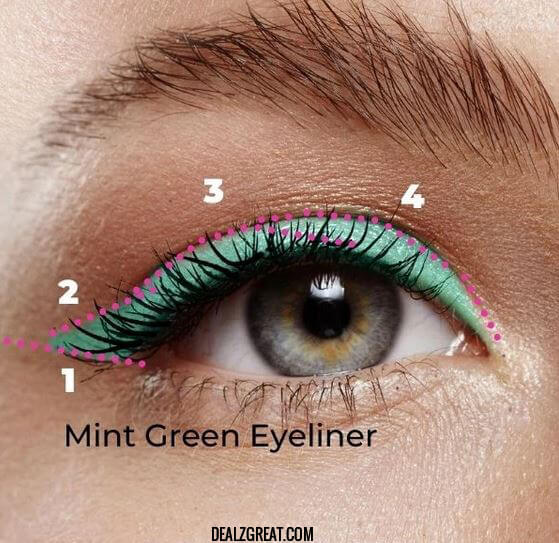
As you apply the eyeliner to the remainder of your lash line and lid, work in portions.
Advertisement
Section 3: Begin at the center of the eye and work your way out to the triangle at the outer corner. Fill in the blanks.
8th step:
Apply portion 4 from the inner corner of the eye, starting thin and working your way to the centre, joining the two areas. Keep the line thin at first, then thicken as you approach closer to section 3.
9th step:
Last but not least, curl your lashes and add mascara.
The Finale!!
I hope you loved these beginning eye makeup instructions and styles, Beauties! This week, set aside some time to experiment and practice. The more you experiment with these styles and products, the more proficient you will become! Try several blending techniques with the blending brushes, such as back and forth (windshield wiper) motions and tiny circular motions, until you get the feel of them. And, as always, if you have any questions, please don’t hesitate to contact me!!
We’re looking forward to hearing from you!! Which of these four beginning eye makeup styles is your favorite? Leave a comment in the box below.